The weather is warming up and the shops are ramming Christmas tunes on repeat. December is here and that means Christmas Light road trips! Whether thats around the block, or half way across town, you can't deny the excitement that our yearly tradition brings. Here's some tips to get the most our of your Christmas Light photography so you can capture the magic with your friends and family.
The Basics
Lights, lights, lights! Taking photos is nothing but capturing the right amount of lights and shutter timing plays a huge role in doing so - how MUCH light is captured!
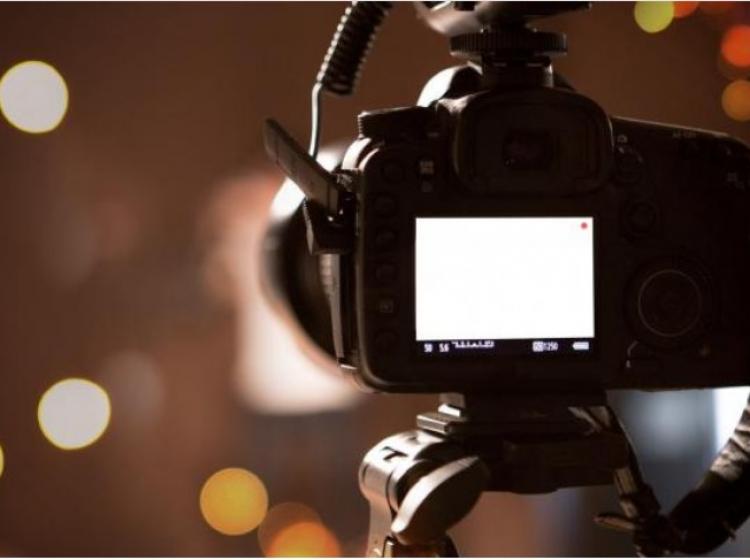
This applies to any photos of Christmas lights or decorations, inside your loungeroom or out on the street. You need to make sure you have a camera (or smart phone) that supports manual mode photography otherwise you won’t be able to customize ISO, aperture, and shutter speed which ultimately may not give those oustanding photos that you are commanding.

Things You’ll Need
Here’s a list of things you will need to take great photos of Christmas lights.
- Camera or Smart Phone with Manual Mode
- Tripod
- Basic understanding of ISO, aperture, and shutter speed.
So get your camera in manual mode, get your sturdy tripod, and let’s go!
Tips: How to Take Great Photos of Christmas Lights
1. Mind the Time
This tip is specifically for outdoor photography of Christmas lights. Sun is the natural light source that helps in taking great photos but you will notice a pitch-black background when you take photos in the dark (in the complete absence of sunlight).
But you obviously can’t take photos of Christmas lights in daylight! The perfect time to take great photos of Christmas Lights is not in the middle of the night either. It’s actually around twilight/dusk; those few fleeting minutes around sunset is when natural light perfectly balances out the artificial ones.
Reach your location early, set up everything, and start before the sunset. Those 30 minutes around the dusk are your golden time for taking jaw-dropping photos of Christmas lights.

2. Resist the Urge To Use Flash
It may occur, but we’re advising you - DO NOT USE CAMERA FLASH. Think about it for a second, you’re capturing the greatest source of lights - lights itself. Extra lights from your flash may overexpose your photos which will ultimately look hazy or milky. Save yourself from the hassle of using a camera flash and if you want to give lighting effects (in indoor photography of lights), we advise you to put some props, objects and use an extra source of lights such as lamps. Look at this pic:
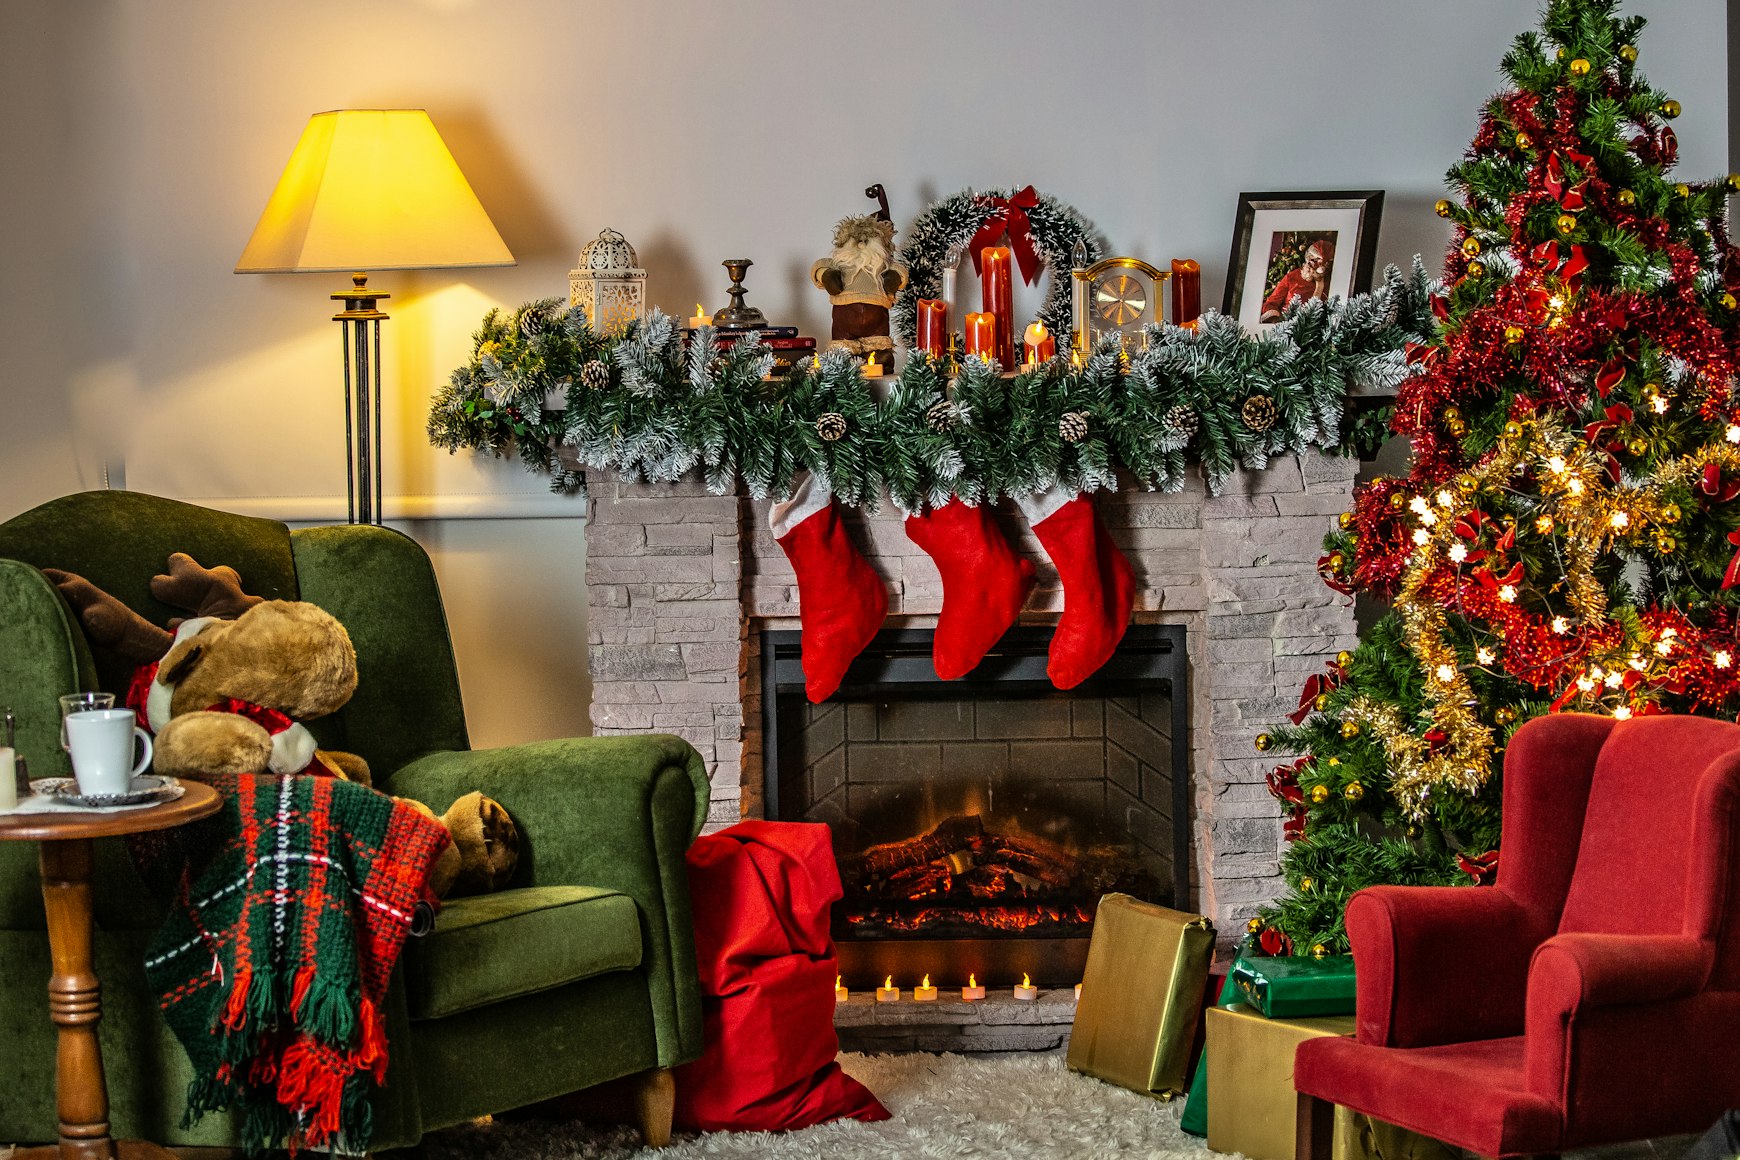
In the above photo, you’ll see the yellow lights from the lamp are reflecting on the green sofa and the reindeer soft toy, giving that part of the image a brilliant look. You may put extra lights in as well to satisfy your requirements. Be creative in your pursuit of that great pic!!
Perfect the timing and use the complement of natural and artificial lights to your advantage. This is how to take great photos of Christmas lights.
3. Limit Your ISO
ISO is the light sensitivity in digital cameras. Increasing it will increase the brightness in your Christmas photos but may also leave higher grains/noise in photos which may reduce the quality of the final shot. That’s why it’s a good idea not to increase the ISO over a particular limit. We suggest keeping your ISO from 400-800.

At Christmas when there are a lot of lights (and happiness), you should always mind the ISO. Nevertheless, when you are shooting outside and lights are not enough, there IS still a way to deal with it as well. Read on…
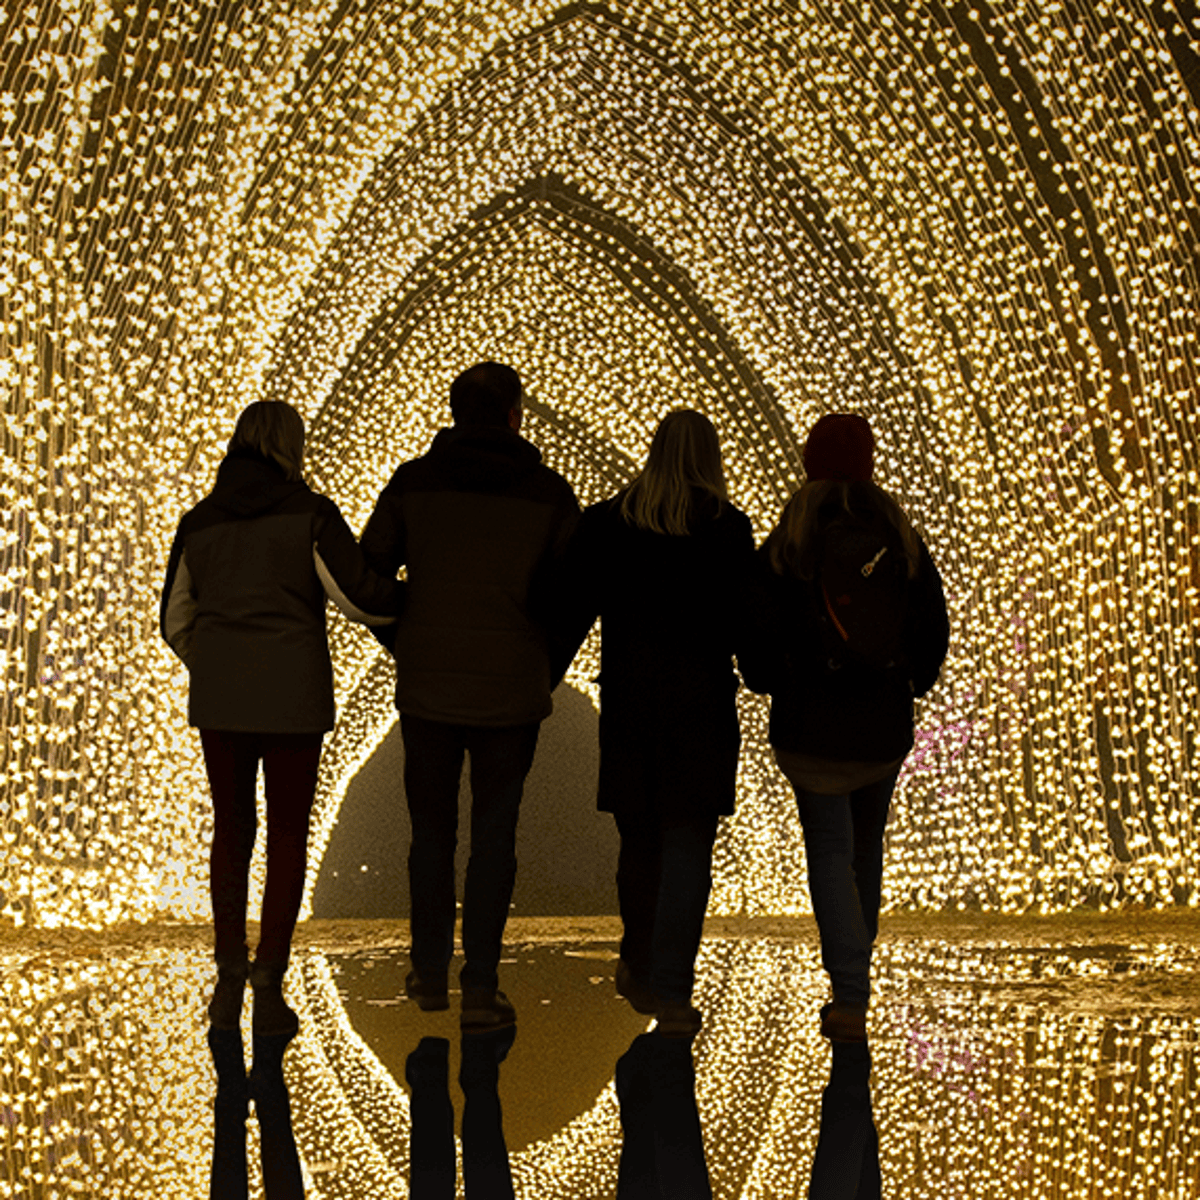
4. Increase the Shutter Speed (Long Exposure)
Here is a creative way to capture more light without increasing the ISO which would have resulted in those noisy photos. Shutter speed is the amount of time for which your camera shutter stays open to capture the light of the subject. As you may guess, shutter speed physically affects the brightness of your photos too, as the provide more time for light to enter the lens.
Look at this beautiful photo captured with a longer shutter speed:

There’s no said rule but long shutter speeds are generally above 1 second. We advise you to use a tripod and take test shots and set a shutter speed that gives the desired result. Remember the longer the shutter, the more lights your camera will capture.
Since Christmas lights won’t be in motion, increasing shutter speed won’t give your photos motion blur - instead images will look beautiful. But be mindful when you capture moving objects such as playing kids, birds, wild trees, as going high on shutter speed will increase the motion blur while capturing them.
5. Widen the Aperture
Aperture is to the camera what pupil is to your eyes. When you go to a dark place, your pupil expands, capturing more light and enhancing your vision. The opposite of course happens when you go to a brighter place. Just like that, cameras also need just the right amount of light to capture exceptionally outstanding photos.
To take great photos of Christmas light decorations, you need to widen up the aperture so more light can enter into the lens. One advantage of increasing aperture is that it increases the depth of field, which results in more background blur and your foreground looking nice and sharp – yep it’s a super cool trick if you’re looking for an awesome profile pic!
Remember your camera shows aperture as f/2, f/4, f/11, etc. It may sound strange but f/2 means that the aperture is wider than what will be in f/4 and much larger than f/11.
If you are doing indoor photography of Christmas lights, you may not need to increase the aperture very much. To create the bokeh effect, keep the fairy lights as far from the subject as you can and increase the aperture!
Indoors vs Outdoors Photography of Christmas Lights
It is more difficult to photograph outdoors than indoors. Christmas brings so many lights and joy that your creative soul just can’t resist. Shooting indoor and outdoor lights however are very different pursuits and for an understandable reason - lighting. Outdoor has a plethora of often uncontrollable light sources whilst indoor is fully customizable. These differences influence the settings on which you need set your camera at.
Indoor Photography of Christmas Light Decorations:
- Timing
No particular time is needed
- ISO
Should range from 400-1600 to avoid grains.
- Shutter Speed
Average Shutter Speed (~1 seconds)
- Aperture
Wide Aperture (Should be around f/4)
- Extra Lamps
Use to complement your photos and avoid ‘nothingness’
Outdoor Photography of Christmas Light Decorations:
- Timing
Golden time is dusk, around 30 minutes after the twilight/sunset
- ISO
Should range from 400-800 to avoid grains.
- Shutter Speed
Increase Shutter Speed (~1 seconds or more)
- Aperture
Wide Aperture (should be around f/4 or more)
- Tripod
Use to avoid motion blur
- Extra Lamps
Not needed
Extra Tips
No one is perfect in this world. Not you, not me, not Elon Musk! Humans are prone to errors. Be flexible, and try to do as well as you can. Here are some extra tips to assure that you reach near-perfection.

1. Take test shots:
Practice makes one perfect. We couldn’t emphasize how true this is. When you prepare yourself to take great photos of Christmas light decorations, do not wait for ‘d-day’ - start before. Take photos in twilight and avoid your chances of any errors when you finally take ‘those’ photos of fairy decorations.
2. Be Creative:
Do not get crazy over just lights and the Xmas tree. Use props, cookies, soft toys, jingle bells, and other decorative stuff to include in your photos. Combine them with fairy lights and try different combinations. Make sure you use a sober and light-colored background to give your photo that dreamy effect which everyone loves.
3. Play with the subject:
Tilt your subject, don’t keep it the center - no, not always. Instead, try out different angles, change the focus, and try to capture emotions. The most beautiful pics ever taken in this world brilliantly exhibit emotions.
4. Change your perception:
It is wondrous how changing mere perception changes the whole course of your photos. But how will you use it to capture photos, how will you show it in your photos of Christmas lights decorations?
The answer is simple, capture the photo with your imagination first! Think then shoot. What do you want your photo to look like? Then pull out the camera and execute the idea.
Quick Recap
Before we lower the curtains, here’s a quick recap of what you have just learned:
- You need a camera which supports manual photography.
- To get the best outdoor shots of Christmas lights decorations, you must shoot around 30 minutes post twilight/sunset.
- Increasing ISO too much may make the photos brighter but will result in granier or noisy photos. Nope, not professional. Keep it around 400-800.
- Keeping high shutter speed (long exposure) will capture more lights giving you some beautiful shots. Maintain it for around 1 second or more as per the results of your test shots.
- Widening the aperture widens the ‘pupils’ of the camera hence exposing photos. Overdoing it may result in overexposed photos. Remember you’re dealing with Christmas lights decorations. A healthy range is f/4-f/8 but be flexible and adjust as per your test shots.
- Do not use the camera flash. Extra lights from your flash may overexpose your photos which will ultimately look hazy or milky.
- Use extra lamps while doing indoor photography of Christmas lights decorations to enhance your photos.
- Play with your subject and change your angles of shooting. Sometimes you may discover an angle that ends up looking far more beautiful than shooting straight on.
We hope you are as excited as we are for Christmas. If this post has helped you even a bit or you think it may help your camera-buddy, please share it!